How To Install Iron Balusters
A step by step guide to installing wrought iron balusters on an existing staircase. DIY friendly.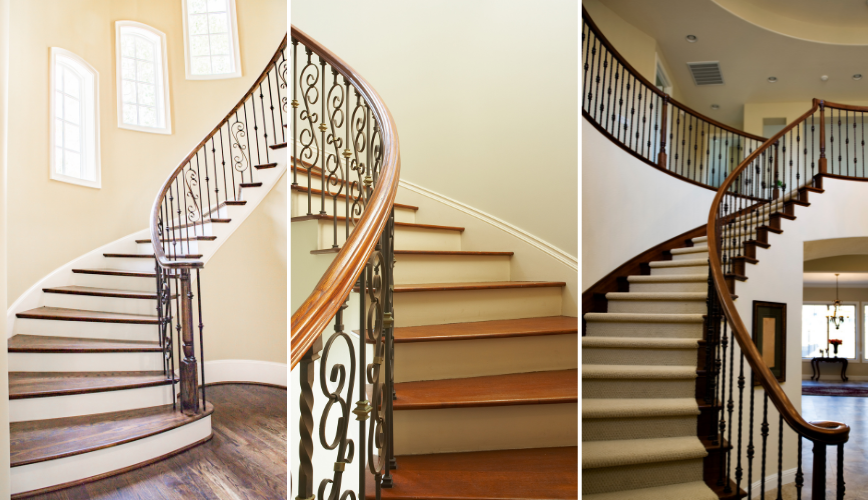
How To Install Iron Balusters
Wrought iron balusters have always been an incredibly affordable, DIY friendly way to update your staircase or balustrade, but even more so now that we’ve started stocking a range of wrought iron shoes to match. These baluster shoes hide a myriad of mistakes - they’re a DIYers dream. As, even the most inexperienced handyman can now install or replace balusters on their staircases and achieve a stunning outcome.
So…how exactly do you actually install iron balusters I hear you ask. Well- we’ve conducted our own research, spoken to stair builders and contractors to bring you the answer! 
Materials
-
Round wrought iron balusters
(square wrought iron balusters are also available, however the installation process outlined below does not apply. Rebated base rail and handrail should be used instead). - 2 x baluster shoes.
Both flat baluster shoes and angled baluster shoes are available - Epoxy glue or another similar construction adhesive.
- Electric drill with hole saw/drill bit a few mm larger than your balusters.
- Jig saw (if removing existing balusters)

How To Install Wrought Iron Balusters
Step 1 - Plan your balustrade design
Before purchasing any parts, or tearing down your existing balustrade, you should first take a moment to plan out your new balustrade design. Not only so that you can decide which style of baluster might suit your project best, but also to ensure your staircase remains compliant.
Specifically, you should ensure that your new balustrade design meets Australian standards for balustrades - as, if you are replacing bigger, bulkier balusters, you may need to consider ordering additional wrought iron balusters to ensure they are spaced correctly. For instance, Australian building code states that at no point in your balustrade should a 125mm sphere be able to pass through an opening.
It’s also important to plan your balustrade for design reasons, as there are so many different styles of wrought iron balustrades available. For the purposes of this article, we’re looking specifically at the round wrought iron baluster range which includes plain, single and double knuckle, single cage, and s scroll varieties. Generally, the more decorative single knuckle, single cage and s scroll designs are used sparingly, and often paired with the plain balusters - however, feel free to mix and match them as you please!
Check out some fantastic examples of wrought iron balusters being used on staircases below.

Step 2 - Remove existing balusters
If you are installing your wrought iron balusters on an existing staircase, you will first need to remove the existing balusters before proceeding to step three.
While the process will vary somewhat from staircase to staircase, most timber balusters can be removed easily with just a jigsaw. Provided that the handrail is connected to a newel post, it should stay in place long enough (and be structurally sound enough) to support itself while you install the new iron balusters.
Depending on how the balusters are fixed, you will either need to cut them in the centre and then simply pull/wiggle them out of the fixing holes, or (if they have been glued in place) cut them as close to the base/handrail as possible and then sand/plane the surface smooth.
Step 3 - Measure and cut your first wrought iron baluster
Using either a tape measure (or by simply holding the baluster between the base rail/tread & handrail), mark a cut line on the first iron baluster. You will need to allow for some additional material for fixing the balusters into the base rail/tread and handrail.
There is no exact science to this, as the end measurement will vary depending on the thickness of both your handrail and tread/base rail. A good rule of thumb would be approximately quarter the height of your rail, and half the thickness of your tread, as you do not accidentally want to split the timber by drilling too deep (nor do you want the baluster to be too tall to slide into place).
If in doubt, always cut the baluster longer first (as it is far easier to trim the material back than fill in any holes you’ve drilled in your handrail/treads). This is also why we recommend trailing the installation with a single baluster first to ensure you have cut correctly, before trimming the remainder of your balusters.
Here’s an example equation for working out how long to cut your baluster:
Distance between handrail & tread + ¼ height of handrail + ½ height of tread
Once you have determined the appropriate height to cut your balusters to, trim them back using a jigsaw.
Step 4 - Drill holes for your iron baluster
Using an electric drill and a hole saw, drill holes in both your tread and handrail to hold the baluster in place. Your hole saw/drill bit should be a few millimetres larger than the balusters you intend on installing, but not so large that you will not be able to adhere the balusters in place.
Your holes should not be deeper than ½ the height of the material they are being installed into to ensure there is no splitting. However, if you are working with particularly deep base rail/treads, you may not want to drill down quite as far as ½ the depth, as this may make slotting the balusters into place difficult.
Repeat this same process with the handrail - drilling slightly deeper than you intend the baluster to sit. This will allow the baluster to slide into place during installation. Again however, you should not drill more than ½ way through your handrail, as this may result in cracks and splits.
Step 5 - Add baluster shoes
Before installing your baluster, make sure that you have slid the baluster shoes over your baluster- as these cannot be added after the fact. You will also need to ensure that the baluster shoes are oriented in the right direction and fit correctly.
Step 6 - Slot balusters into place & secure using adhesive
Next, slot your baluster into place by sliding it into one hole & adjusting until it also fits into the other. If you are finding this step difficult, you may need to widen one hole slightly, or trim back your baluster so that it fits nicely into the space.
You will need to ensure there is enough material inside the handrail so that it does not come loose, but not so much that it cannot be maneuverered in. Again, this is unfortunately not an exact science, and will vary somewhat depending on the configuration of your staircase. Some trial and error should be expected.
Once your baluster is in place, use your adhesive to secure the baluster in the base rail and handrail.
Tighten the grub screw on the shoes to hold them in place. A small amount of adhesive can be used if you wish.
Step 7 - Repeat process with all iron balusters
Once you have your first baluster in place, use these measurements to repeat the process for all of your other balusters - keeping in mind the regulations regarding how far apart they should be spaced.